NASAM Update as of the 22nd Jan 2025
In This Edition
Summary of Contents
A shortish edition of the blog this time around, with some photos in the “Museum News” from Steve on a winter day at the Museum,
From the Teams “Inside and Outside – The Museum“, we have an update from Barry on the labours of the Paint Team over two weeks at the start of January. We have more from Malcolm on his efforts to provide models for the various displays. Last, in this section, we have another Dead Reconning article from Tony, this time using “Chart Boards”
Next Edition
In the next edition of the NASAM Blog, we will have Graham’s fourth of his four-part summary of the happenings at the Museum throughout 2024. To read his Q1 to Q3 articles so far, click on the link below.
Pete S
Museum News
General news from the Museum
Winters Tale
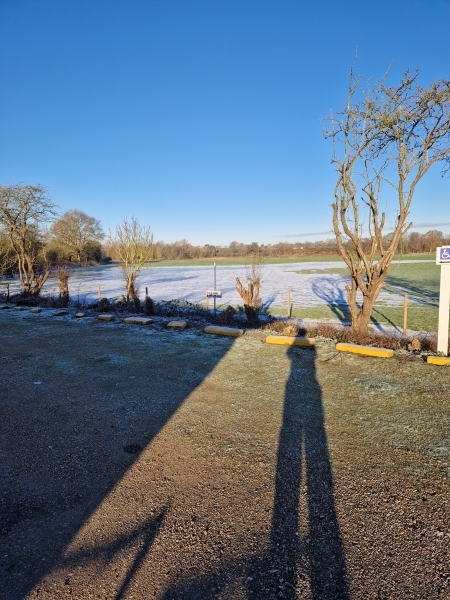
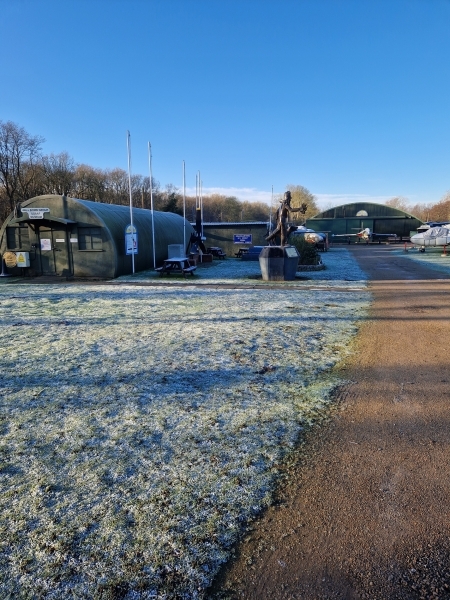
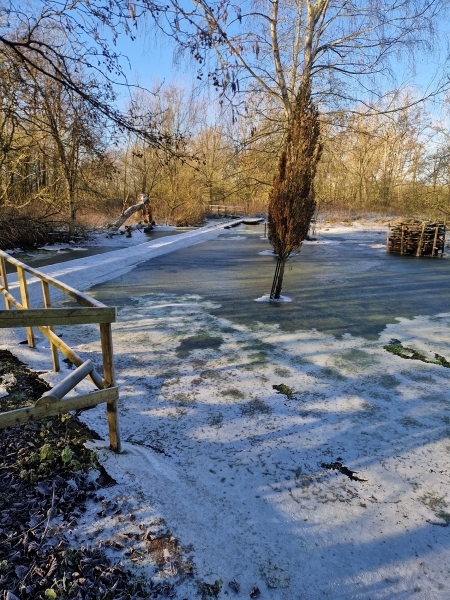
On a visit to the museum on Friday 10th January most of the area was covered in ice.
The meadow at the back was icy as well, but the flood water that had been under the ice had soaked away leaving a surreal landscape.
Steve
(Photos) Winters Tale
Inside and Outside – The Museum
Information from the various teams
Paint Team Updates
07/01/25 – Brass Monkey weather!
I dunno, how are craftspeople supposed to work in such conditions? With the car temp reading a mighty 1 degree Celsius upon arrival, the ambient temperature in the hangars was undoubtedly less than this!
In order to ‘warm up’ Barry decided to take down the scaff’ tower by the Lightning as Tony and Ivor had managed to close the cockpit canopy for the winter (good job!). 20 minutes later and with no feeling left in his fingers the scaff’ was down and then wheeled away by Gwen.
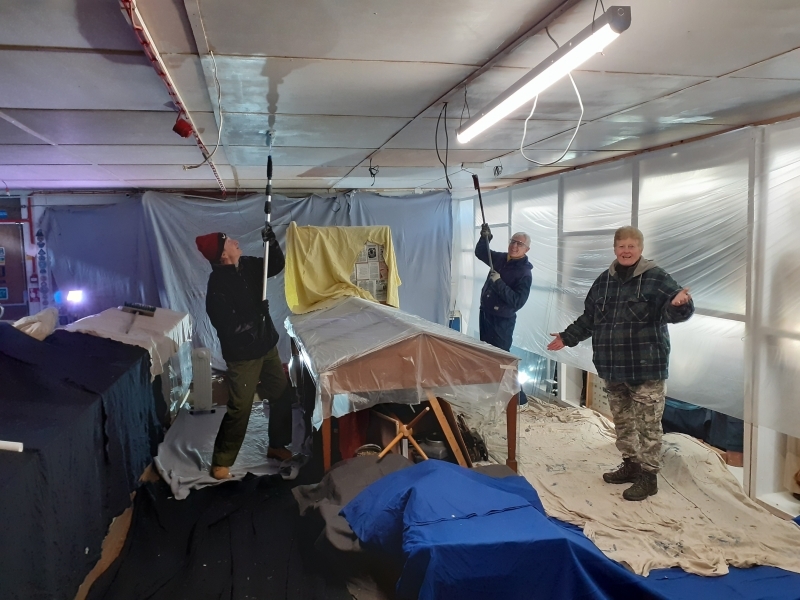
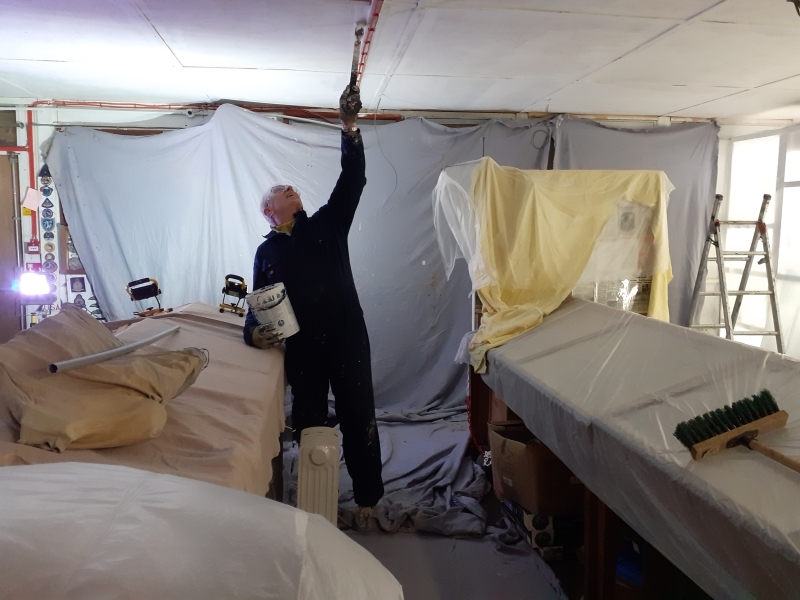
Over in Room 3 our brass monkeys (Mark and Ian) got cracking with undercoating the recently replaced Room 3 ceiling panels (see pic). By close of play it was 38 panels down and 10 to go before enthusiasm ran out.
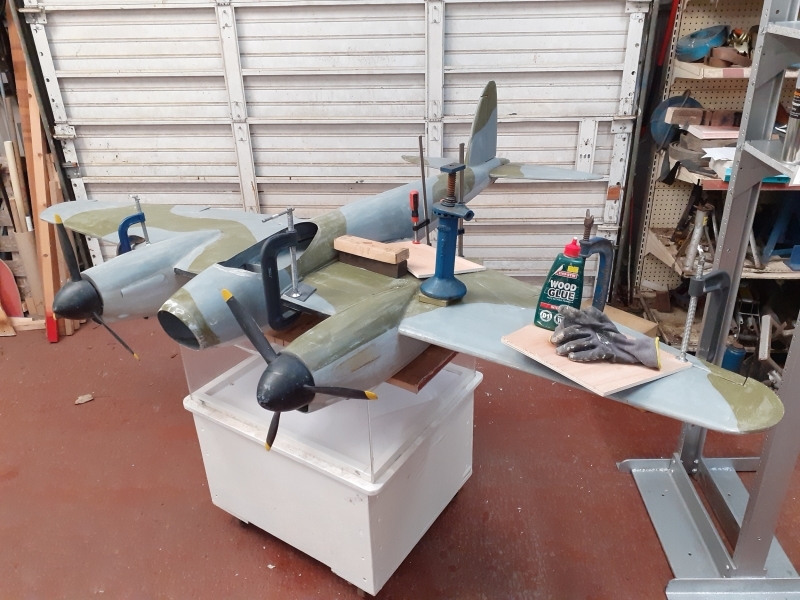
Up in the Restoration workshop, Barry spent the rest of the day repairing the Mosquito model. Sticking relentlessly to the task (geddit), by the end of the day he had stuck back down all the areas of the wing skin that had lifted and left them clamped or weighted down while the glue goes off…slowly in the very cold weather (see pic).
Barry also removed the damaged nose blister for further analysis. We have found a company that can potentially 3D print a replacement for us, but they need accurate drawings of the original full-sized blister, or a decent smaller model that they can scan and copy. If anyone at the museum can help me with sourcing either of drawings or donor model, then please let me know.
14/01/25 – Living on the Ceiling!
Yes, 80s pop pickers, it was a Blancmange kind of week this week, as it felt like we were “living on the ceiling” in Room 3. As the rather tedious hard yards continued with another week of undercoating, we certainly weren’t in the mood to do a Lionel… (…Ritchie “dancin’ on the ceiling”).
Gwen, not enthralled by another week of Room 3 action decided to paint the Shop door instead. Fair play.
After the paint had been defrosted (not kidding), the Skipper (Cliff) and Mark set about completing all the finnicky bits of ceiling undercoating with a mixture of different painting contraptions (see pic). By close of play, the first coat had been completed. Next week should see us breaking out the white emulsion (yawn).
Elsewhere, Barry spent the morning taking off all the clamps on the Mosquito model up in the Restoration workshop to see if his ‘gluing back down’ repairs had been successful. All seemed good so his attention quickly turned to filling a couple of cracks in the wing skins with some flexible filler. After that, the re-engineered wooden exhaust shrouds were offered up. These will replace the previous ‘low rent’ tin foil ones.
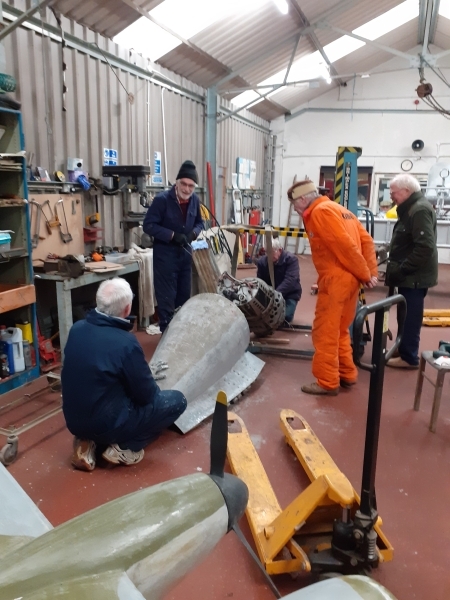
Around lunchtime there was a bit of sideshow going on in the Resto workshop as Tony sought to remove the innards of the spare Lighting radar cone. After much huffing and puffing (and a bit of fruity language) the innards were eventually pulled out by a combination of Ivor, Tony, Mark, a hacksaw and the big hoist (see pic). A very satisfying end result (for Tony).
With a low flying Skeeter helicopter due into the Resto workshop next Tuesday, Barry had been asked in the week to relocate the Mozzie model, and so Barry and Mark duly squeezed the Mozzie through the side door into workshop extension area, ready for paint and decals.
Barry
(Photos) Paint Team Update
![]()
MMU Update
My first attendance at the museum in 2025 last Tuesday ended with the transfer of more models into the Model Store. To assist with the clearance of the space behind the Sycamore and Anson, 30+ models relating to a display of Naval Aviation were packed up into 3 boxes and are now in storage awaiting ‘processing’, ie whether to keep or add to the growing number of models in the next batch for sale. These models were originally donated by Mrs N Foster in 2008 in memory of her late husband Donald who served in the Royal Navy. It appears many of the models are in good condition and will be candidates for keeping, although some were damaged and/or of poor quality and which we already hold better examples in store. Sorting them out will have to wait until later in the year as I have more pressing work waiting in the wings.
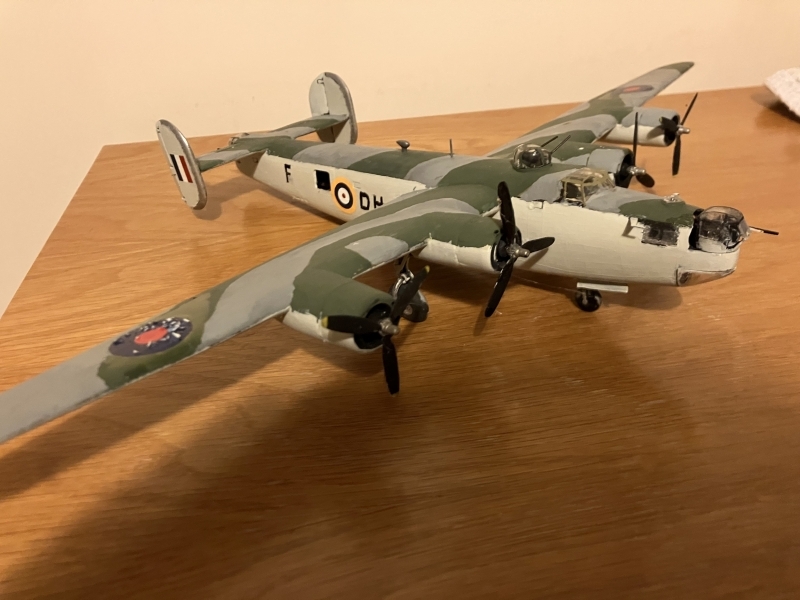
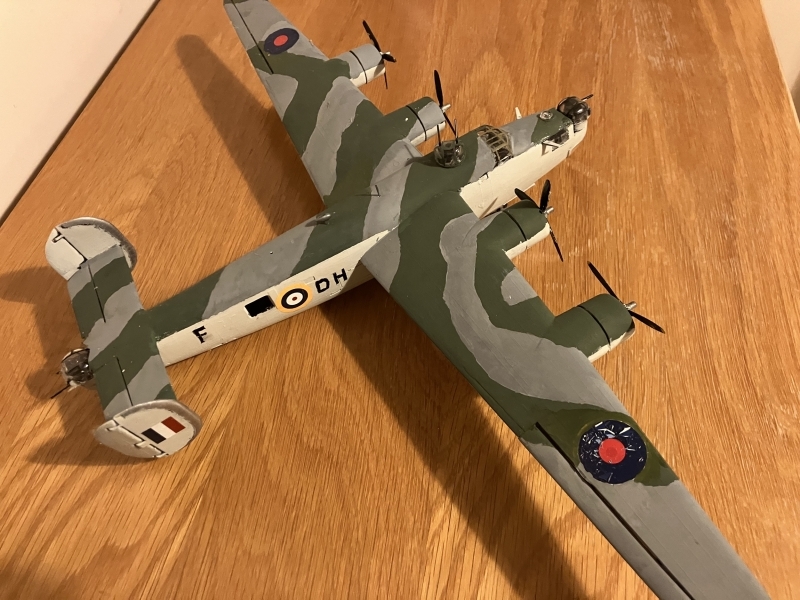
Earlier in the day a visit to the team renovating the ASR rooms ended up with them gaining a model of a Westland Wessex HAR.2 in full RAF SAR colours. In the opposite direction, a Coastal Command B-24 Liberator model was handed over for renovation with a view to returning it to display hopefully before the museum reopens in mid February. Whilst almost complete parts wise, the existing paint work leaves a lot to be desired. I have therefore decided to completely repaint it, new decals have already been ordered hopefully delivering the Liberator back to ASR in the markings of 220 Squadron. It needs a few guns and missing aerials added , I should have these in my spare parts from other B-24 models that have previously been decommissioned.
Malcolm
(Photos) MMU update
![]()
Dead Reckoning (DR) 2: Chartboards
We looked last time at solving our nav triangle problems by scale drawing; a worthy method, but time-consuming and prone to inaccuracies – very much a last-resort technique. (As a matter of course, I should give our nav triangle its proper name: the ‘triangle of velocities’)
As the need for more accurate ways of solving this triangle became necessary – cockpits were enclosed and aircraft were flying faster, higher, for longer and in worse weather conditions than ever before – the RAF turned to former Royal Navy navigators … and the chartboard was the result. In its earliest form the chartboard comprised a straight edge and 360° disc – known as a ‘compass rose’ – marked centrally with a North-South line – known as a meridian – both being pivoted at the end of an articulated arm. This arm was clamped to a board on which the airman mounted a map.
The earliest version owned by the Museum is the Type B from which the foregoing is taken. After aligning the compass rose with a map meridian, the straight edge is turned to lie along the line of intended flight drawn on the map. The bearing of the line can then be read from the compass rose.
The Type B gives only the bearing of the required track. It is, essentially, a protractor (and an unwieldly one, at that!); there is no way of compensating for the effects of wind in flight.
The Type D, illustrated below, is a more sophisticated version and marks the first military example of a mechanical way of finding the missing elements of the triangle of velocities (in maths terms, ‘solving the triangle’).


Pivoted at the end of the articulated arm is the compass rose, from which extend 3 arms: the longer arm is scaled for ground speed, the arm above it scaled for airspeed and the short arm for wind speed. The first two arms form the ‘track’ and ‘course’ sides, respectively, of our triangle of velocities. Before any data is ‘entered’ into this mechanical computer, consider that the pivot lies over the initial meridian point, equivalent to that point in our scale drawing from which the track line was drawn.
In operation, the wind direction is set by rotating the compass rose until the given wind bearing is at the white arrowhead (pictured above). The wind speed is set by moving a clamp on the wind arm; this causes the whole pivoted assembly to move a short distance from its initial position, thereby creating the ‘wind’ side of the triangle; the other two sides being created by the longer arms above … broadly speaking. Thus, our complete triangle of velocities is mechanically re-created.

The air speed is set by moving a clamp on the ‘course’ arm, as shown.
The compass rose is then turned so that its meridian is parallel to the N-S grid lines on the map. The course to steer by is indicated in the window at the base of the ‘course’ arm as also shown in the picture. The ground speed can be seen on the ‘track’ arm, marked by pointers mounted either side of the centre of the arm, illustrated above.
While being a great improvement on the Type B, the Type D is as unwieldly and not designed for use in single-seat aircraft. We will see in the upcoming articles how these problems affected the design of subsequent DR instruments. Spoiler Alert! The next article contains some maths … which will be fully explained, so, please, bear with me! In the meantime, check out this front cover:

The magazine is dated 29 April 1939 and, while not being a photo, clearly shows a group of airmen – trainee navigators? – with what appear to be chartboards. If you look at the centre figure, whose chartboard faces the viewer, a straight edge and a compass rose are visible; might this be a Type B? Contrast that with the following, taken from Popular Flying (June 1934):

You will recognise the triangle of velocities in the sketch, but I would draw your attention to the photo at the top right of the page. This is a civilian course-and-speed calculator – part-developed by the author of the article, so some conflict of interest there! – available to flyers at least 5 years before the RAF is shown to be still using chartboards. However, as we will see in upcoming articles, the RAF did catch up quickly in the development of its own version.
DR1 Problem
Last time, I left you with a nav problem to be solved by scale drawing. For the intrepid souls among you who had a go, the solution is below:

I know that you’re all keen (!) to try another of Mansell Williams’ problems, so:
The airspeed of an aircraft is 150 mph. In what direction must it be steered to fly to an aerodrome 137 miles away, bearing 315°, if the wind velocity is 237°/39 mph? How long will the flight take?
(Hint: for the last bit, remember that ‘time’ is ‘distance’ ÷ ‘speed’ and that the units of time are ‘hours’ …)
Answers next time; bonne chance!
Tony L
The Repeat Info
Here we are, the start of a new year, and despite the fact that we will now raise some monies through our admission charges, the repeat information is still here, I’m afraid, and I make no apologies for keeping his section in our blog. We are a charitable organisation relying on some grants and monies from the public to keep us going. Any help we receive is gratefully accepted and enables the museum to continue in our mission “To conserve, preserve and promote the history of aviation in East Anglia, whilst providing a fun, family-friendly and interactive museum, promoting education and remembrance of the events of the past“.
Are you thinking of helping ??
 We save money by having a dedicated group of volunteers that keep the museum and the exhibits both manned and maintained. We hope therefore a few people may consider helping in the ways below.
There are three easy ways to help: Help by becoming a Museum Member, also by Volunteering to help at the museum, or by Donating to assist in our running costs. Please click on the appropriate button below to access the appropriate information:
Keep Up To Date
![]() To keep up to date with further information, please keep an eye on our Social Media (see the Social Media buttons at the foot of this blog) or click on the button below to be notified by email of any upcoming changes by seeing the latest blog.
To keep up to date with further information, please keep an eye on our Social Media (see the Social Media buttons at the foot of this blog) or click on the button below to be notified by email of any upcoming changes by seeing the latest blog.


