NASAM Update as of the 28th Dec 2021
[joli-toc]
Chairman’s Update
Main Hangar Progress
We are making progress on the main hangar in a number of areas, however, at the moment it looks like a complete tip. Things that haven’t been moved for years have been moved, and things that haven’t been cleaned for years have been cleaned.
On the ejector seat display, most seats that are returning to display have been cleaned and will return to the display area once that area has been cleaned and refreshed.
The Merlin display is progressing as well, the next task is to refresh the Hurricane model and rehang that above where the new display will be. Then we can move other items around and replace the ancient signage.
In the NAAFI area, work on the kitchen ceiling is almost complete, it should now offer a much more suitable appearance. Work on the electrics is also progressing.
In Other Areas
As you will have seen in the last Online Flier, the modeller’s den is getting a revamp, the aim is to recreate a den that shows different periods in the post-war decades, and that represents the ordered chaos to be found in such places. This will be a showcase of some of the superb models that we have available to us.
Also both in the last edition and in this one, the paint team are working on cleaning exhibits and refreshing the display in Bomber Command.
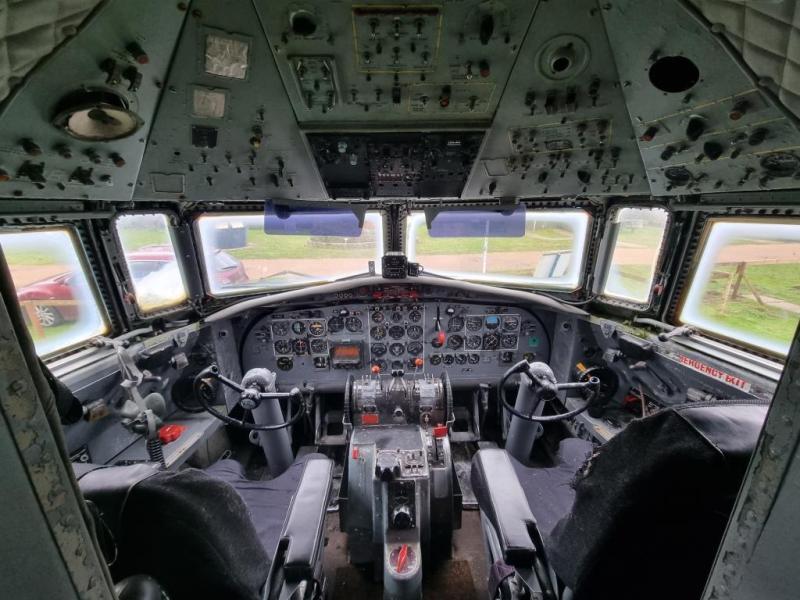
Work has been underway on the Fokker F-27 to improve the cockpit area; and in Engineering, work on the wrecked airframe of the Zenair progresses to turn this into a replacement flight simulator that is a bit more COVID friendly than the current ANT-18 based version. More on these later in this blog
Work continues to keep the grounds as clear of leaves as possible, and especially the gutters which are prone to filling at the least opportunity. During the winter all of the barriers will be replaced with new ones that are simpler to move thus making the work of Ground Force just a little easier.
Last Call for Museum Manager
The Norfolk and Suffolk Aviation Museum is seeking to employ a museum manager, this is a full-time post. The details and a full job description can be obtained by clicking on the button below.
The closing date for applications is by Friday 31st December.
Steve
Museum Special Open Days – December
Whilst the Museum remains generally closed to the public so that we may carry out maintenance and a shuffle of exhibits, it is planned that we will open to the public on two days this week.
The dates chosen are, Wednesday and Thursday the 29th and 30th December.
On both of these days, we will be open from 1000 until 1400.
There is no need to book in advance.

General Updates
Welcome to the last Online Flier for 2021. The latest contributions to this edition have come from the Chair, Steve; from John in engineering showings workings on the Zenair to Flight Simulator conversion, from Barry who has painted a picture of the Team at work, from Cliff who has kept us updated with various exhibit movements and last but by no means least from Paul (a new contributor) who has refreshed the Fokker cockpit ready for the new season of visitors.
I hope you enjoyed both the past and this edition; hopefully, there will be many more to come next year.
Pete (aka bloginfo)
![]()
Engineering Update
21/12/2021 Flight Simulator Progress
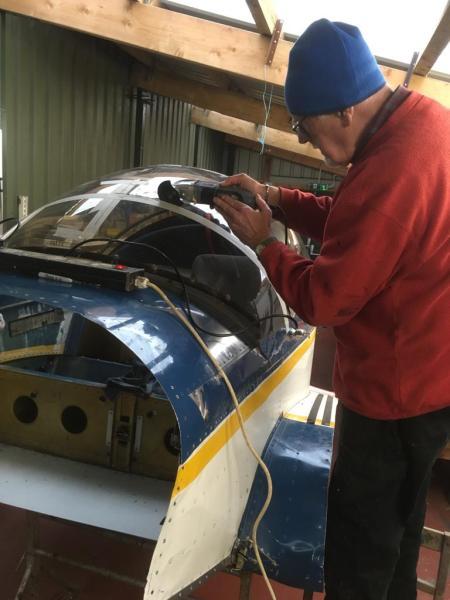
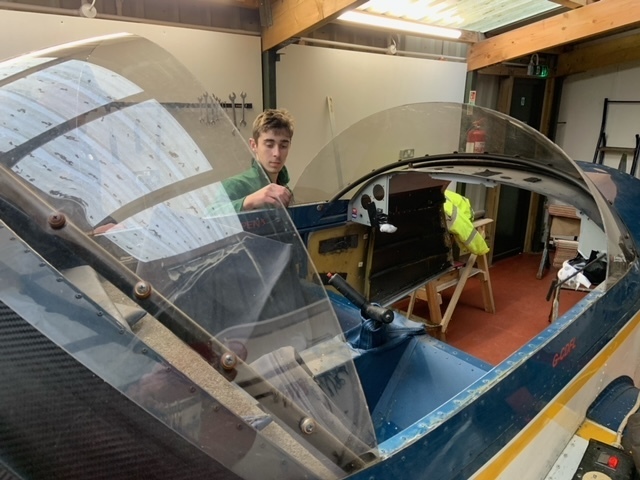
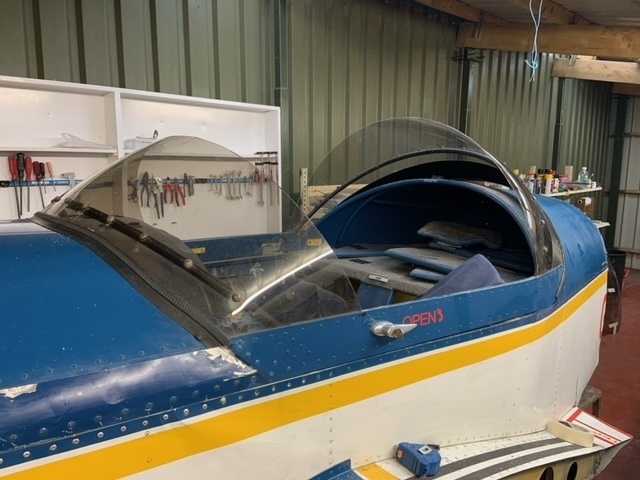
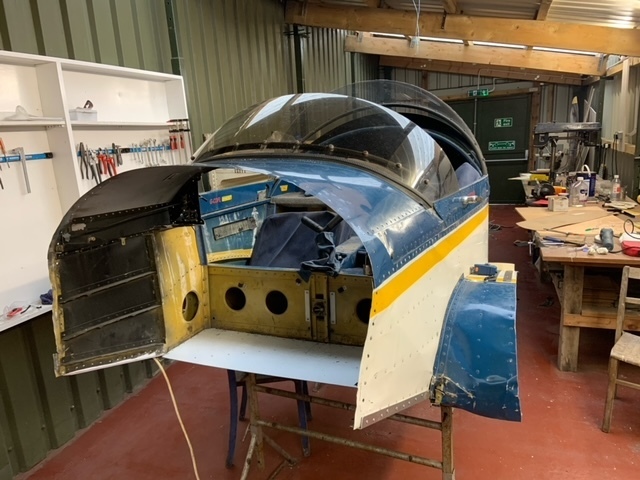
Today, with James, an aeronautical engineering student from Norwich City College, we made some good progress on the conversion of the wrecked Zenair to a Flight Simulator.
Engine bay metalwork reinforced ready for the new floor and bulkhead. The cracked canopy has been cut to make access easier (now an open-topped tourer) and the port wing damage cut away. A plywood panel has been cut to fit the hole aft of the cockpit where we removed the buckled rear fuselage (Zenair-CH601-22 thru 25).
Next will be the removal of the old control column and sorting out seat cushions and cockpit trim.
John
(Photos) Engineering Update
![]()
Painters Update
21/12/21 – Who ate all the pies?
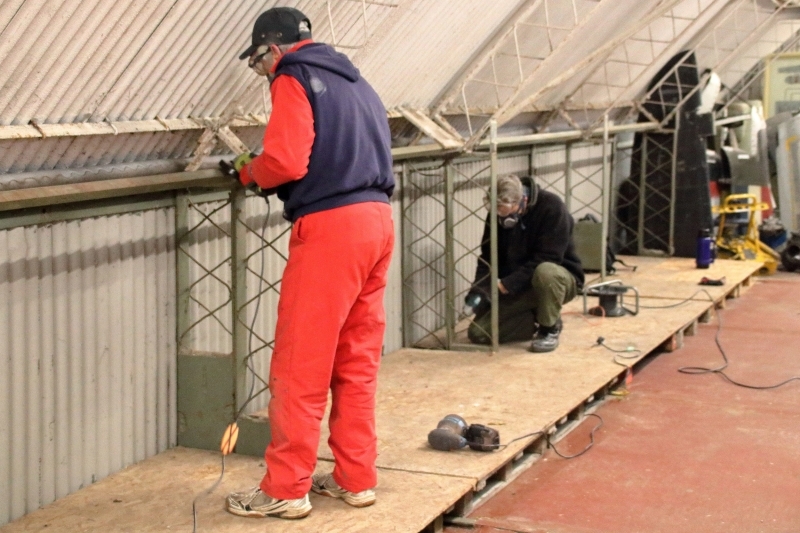
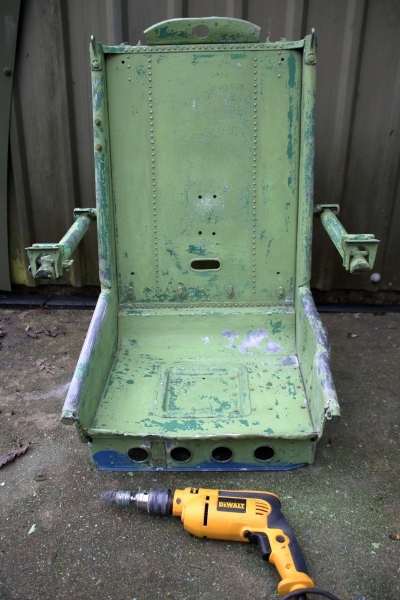
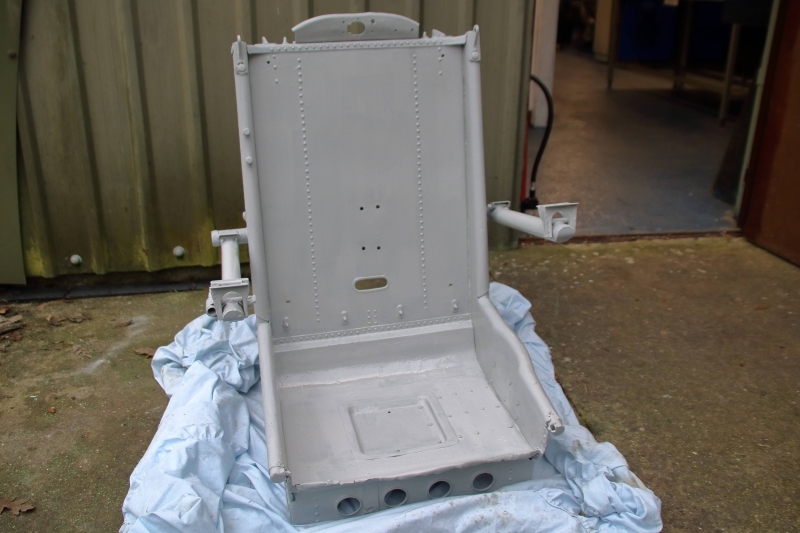
This week there was an air of frivolity in the Main Hangar as the team collectively counted down towards Christmas. In the morning, the senior types (Cliff and Gwen) continued with their cleaning of exhibits in Bomber Command. Meanwhile, the rank and file (Mark and Ian) set about sanding down and rust prohibiting the Main Hangar steelwork in the vicinity of the soon to be re-commissioned Ejection Seat display (see Hangar Refurbs 01). Outside (where it was warmer) Barry set about sanding and grey priming the Lancaster pilot’s seat, with a view to returning it to a period correct darker shade of green (see before and after pics Ejector Seats 01 and 02). Showing commendable dedication to duty, Cliff agreed to spend the festive period researching the correct shade of WWII aircraft interior green, ready for application in the new year.
At lunch, everyone rocked up with additional mince pies and various other seasonal fancies, which were gratefully received and then devoured by the team, with Mark leading from the front and appearing to be happy to ‘take one for the team’ as it were. High Viz John added to the sweet treat-fest by throwing into the mix some Lebkuchen; a seasonal Germanic gingerbread, coated in dark chocolate. Sehr gut mein freund!
The afternoon saw the completion of the morning works, followed by the obligatory end of day cuppa, with old hollow legs polishing off the last of the mince pies!
See you all down the gym in January!
Barry
(Photos) Painters Update
![]()
Vulcan Underwing Pylons Loan
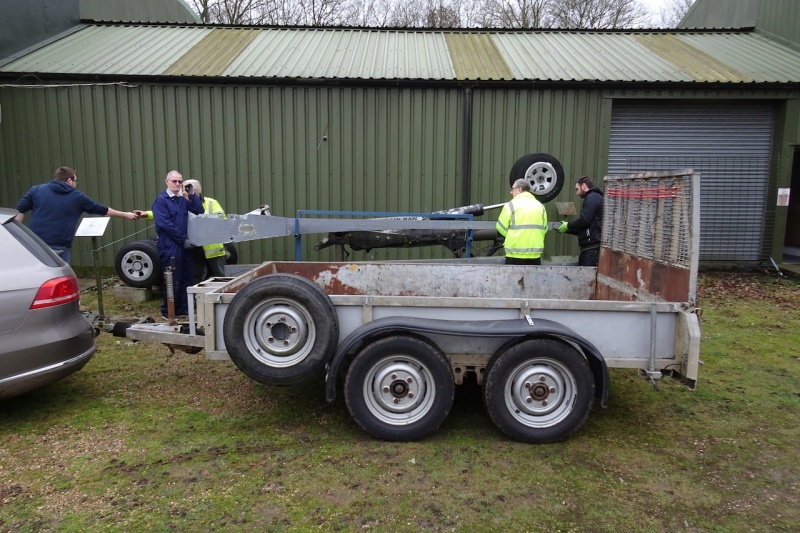
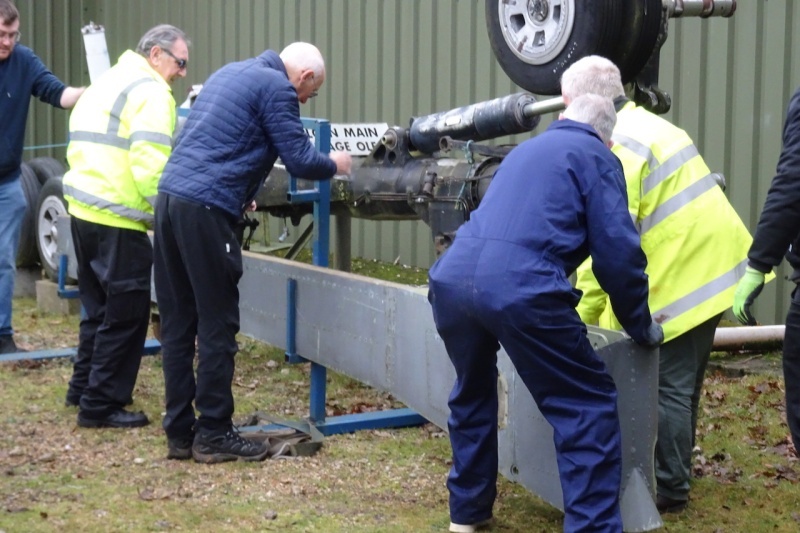
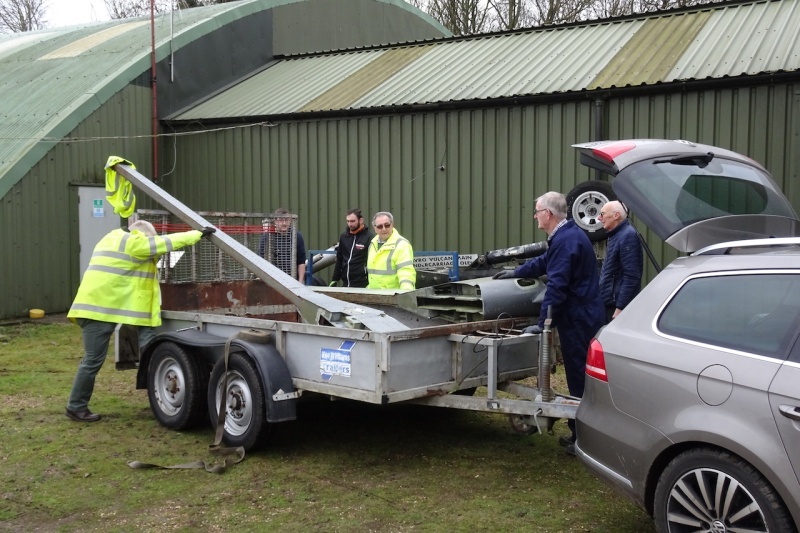
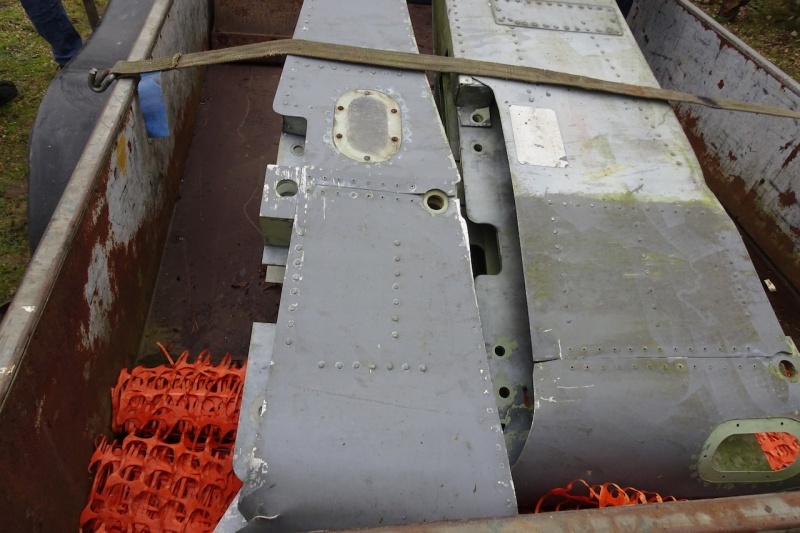
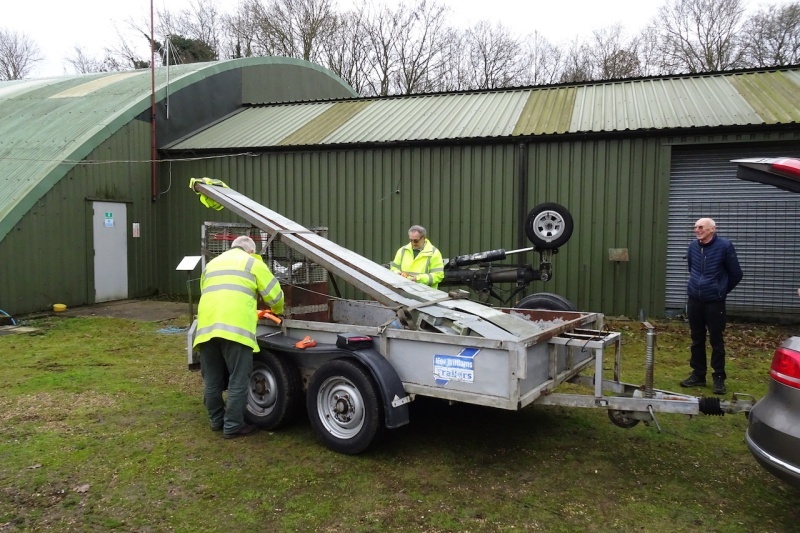
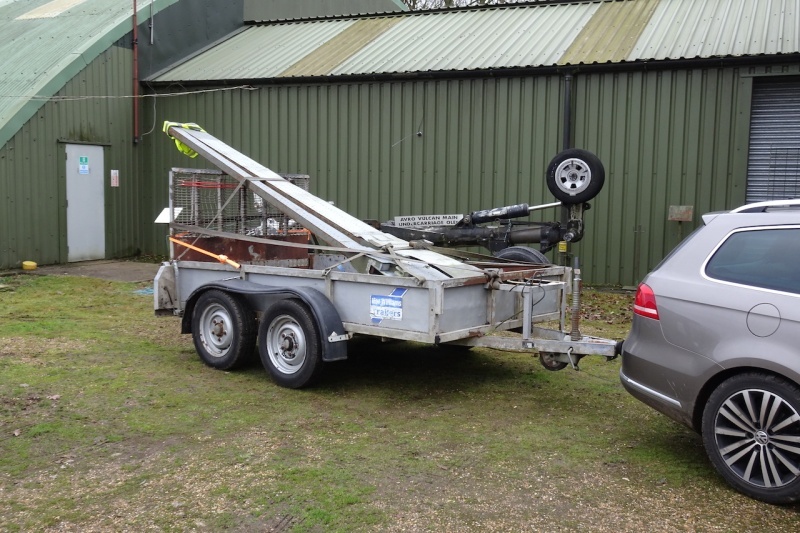
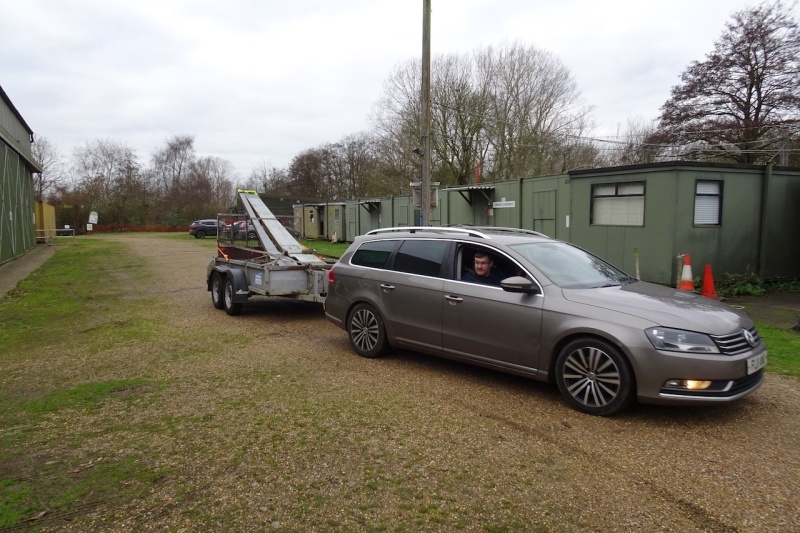
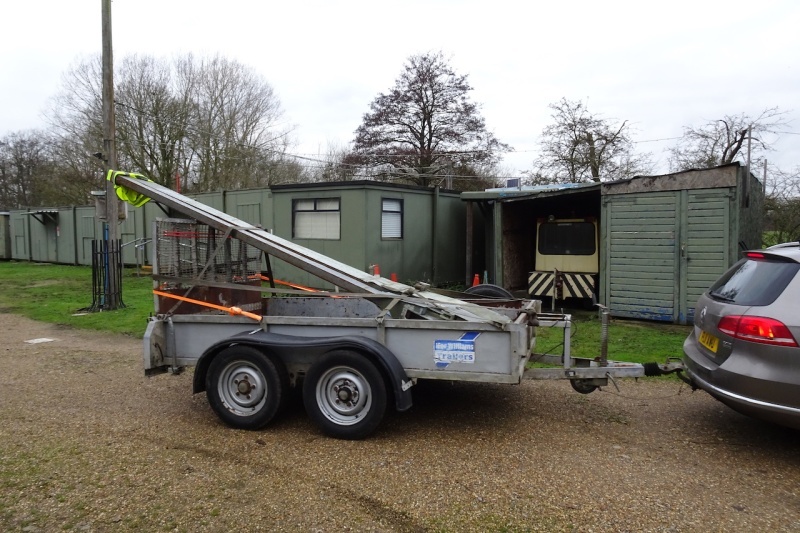
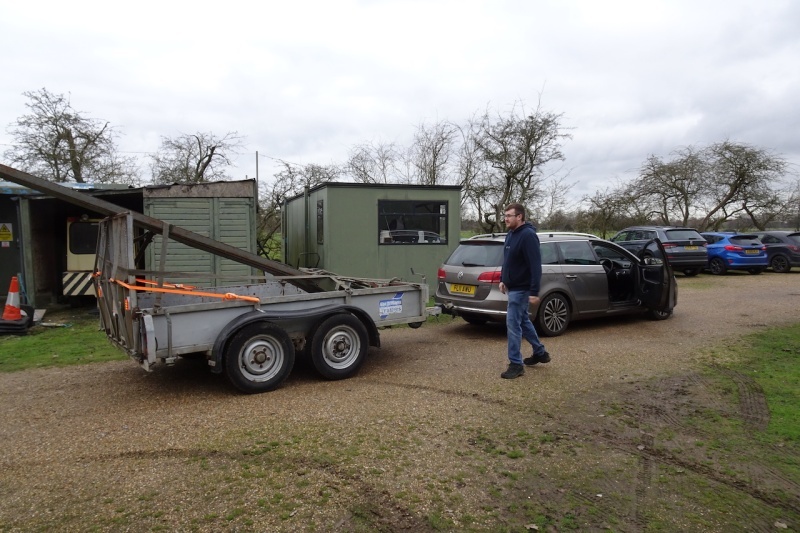
As reported in “Moving Day” in the Online Flier of the 3rd Dec, some TSR2 and “V Force” parts were moved to make space for a storage container to be positioned at the back of the Hangar complex. At the time we thought that the City of Norwich Aviation Museum (CNAM) may well use some of them in their “Falklands Display”. On Tuesday the 21st of Dec, the folks from CNAM came along and collected our Vulcan underwing pylons. These are now on loan to CNAM as they are hoping to fit them to their Vulcan B.2 XM612 along with a Martel missile and jammer pod for the 40th Anniversary of the Falklands next year. Photos of the pylon collection (Vulcan Parts 01 thru 09) are below.
Cliff
(Photos) Vulcan Underwing Pylon Loan
Fokker F-27 Cockpit Refurb
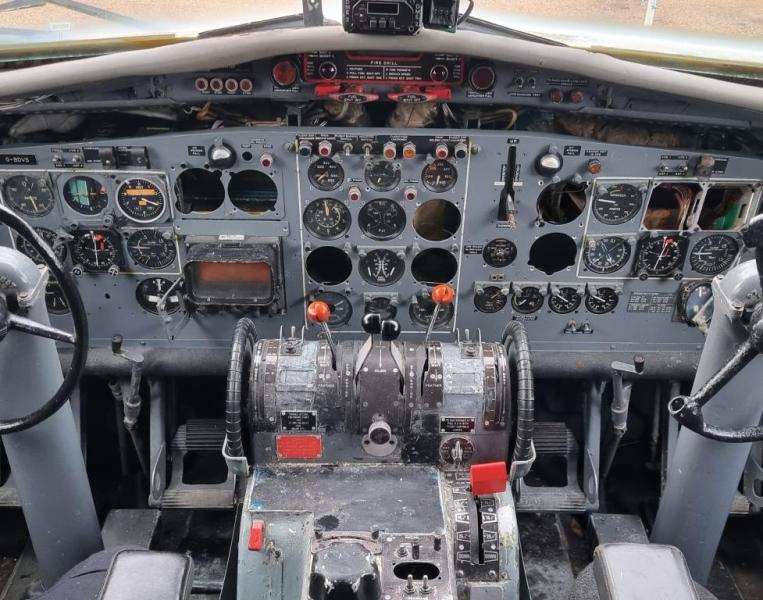
 During the summer I have shown a lot of people the cockpit of our Air UK Fokker F27-200, G-BDVS and they have had the opportunity to sit in and experience it. I thought it looked a little tired and in need of some TLC so this winter I began a project to improve the cockpit appearance and hence the experience of our visitors. The plan was basically to complete the dash instrumentation, repair/replace the broken elements within the cockpit, build replacement knobs and switches, clean the area, repaint the cockpit areas and refresh the labelling. Clearly a lot of work needing to be completed, but every journey starts with a first step and so I began by completing the main dashboard area.
Initially there were 7 instruments missing, but on further inspection 3 of the instruments in the dash were of a different fitting type and could not be fixed to the dash so needed to be replaced. So I began the process of creating the 10 required instruments.
The first step was research for the Fokker F-27-200 cockpits and the instruments they generally used. I was lucky enough to find imagery of a sister ship of our airframe, G-BMXD, which was a Fokker F27-500. Although the airframe was a later model, the cockpit image had a lot of similarities to our airframe and provided good guidance for the missing instruments.
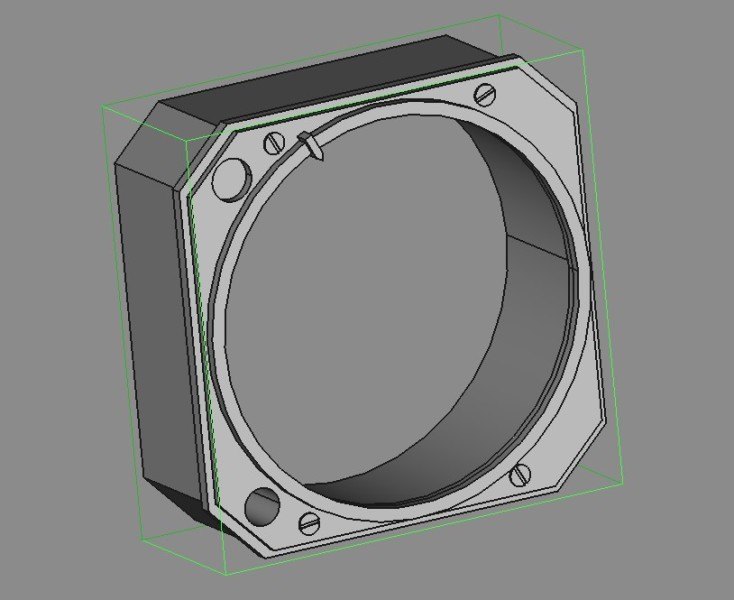
The process for creating each instrument was to firstly measure the hole available in the dash as accurately as possible. Then a three dimensional technical drawing was created using FreeCAD, a free to use software Computer Aided Design programme. I had no previous knowledge of using CAD programmes but I can say now, two months later, that I think I know the basics!
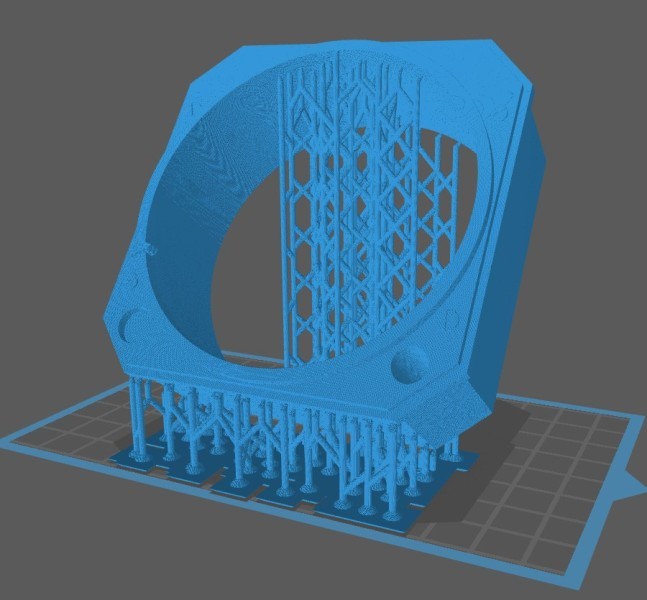
Once the 3D drawing was created I then had to transform it into a mesh skin and import this into a 3D printing programme. Sounds difficult but in fact those steps were just a matter of selecting the right options in the ‘Save As’ drop down menu option of the CAD programme. 3D printing was the technique I used for each instrument. This technology basically takes a 3D model and slices it up into many layers. For my printer each layer is 0.05mm thick. The layer is then constructed in plastic by lowering a build platform into a tank of liquid plastic resin, exposing the resin using a LCD Laser that draws the layer shape. The laser causes the plastic resin to become solid plastic and the build platform moves up 0.05mm and the process is repeated for the next layer. Some of the instruments required 1,600 layers to print which took 6 or so hours. Again 3D printing was new to me so I had a steep learning curve for that too.
Once printed each instrument consisted of a main body piece, perspex front window, a spacer ring under the perspex disc to keep it above the face of the instrument. Then an instrument face was created in a graphics package and attached to a back plate after being laminated to help defend against the dampness in the cockpit. Everything was then put together to make the fake instrument. Some instruments needed one or two knobs on them so these were printed in the same manner and attached to allow them to be rotated if tried by the public. The instrument was then test fitted, adjusted if possible or reprinted if major changes were required.
One simple issue I came across was identifying the machine screws used in the cockpit. As the Fokker was made in Holland in the early 1960’s I wrongly assumed they would use metric screws. Measurement of the few original screws still in the dash showed me how wrong I was as they were all UNC threaded. I was able to source most of what was needed but the smallest screws with a 40 thread count were difficult to find. A search through the restoration workshops screw boxes didn’t reveal any hidden treasures but Dave in the main workshop came to the rescue as he handed me a box of mixed screws that contained the exact type I was looking for.
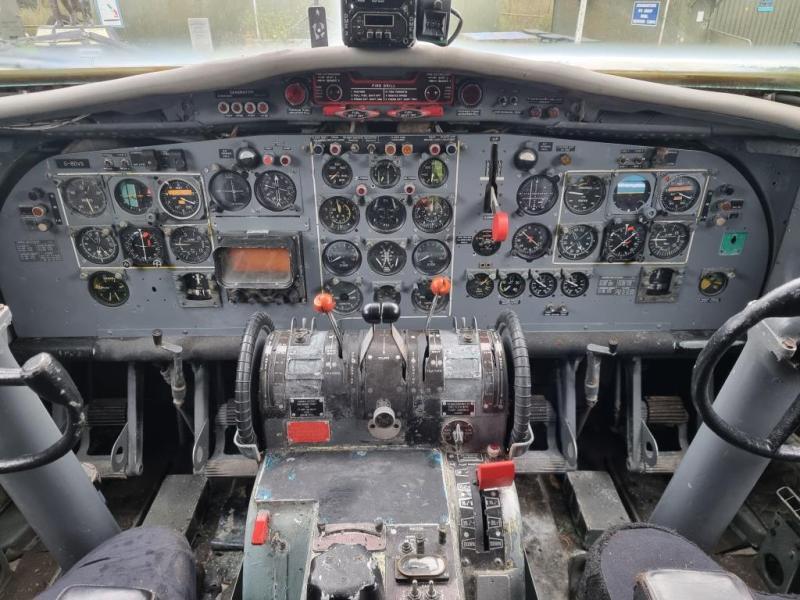
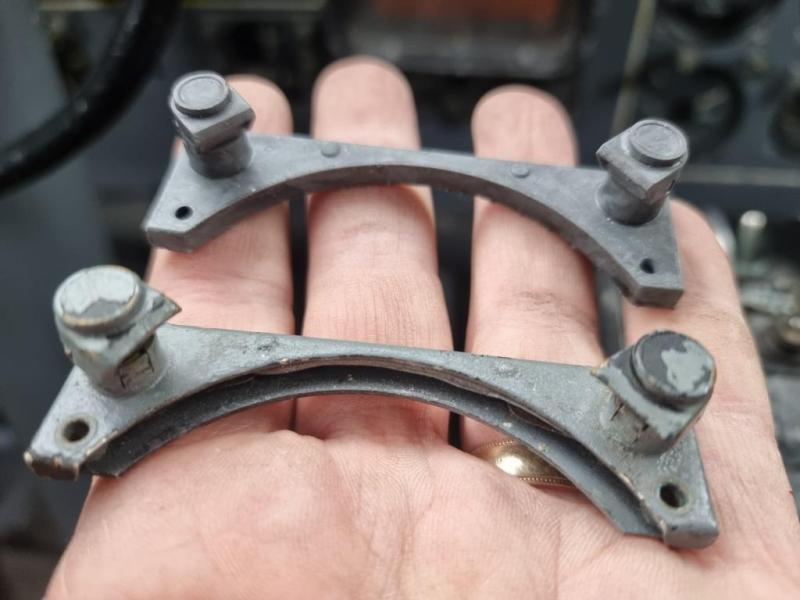
Instruments fitted, fake lights added, replacement light bars added and replacement push switches installed, the dash now looks mostly complete. There are a couple of switches still needing to be added but the exact purpose and layout of these is unclear on the pictures I have been able to source. I think I may need to reach out to our friends at Norwich Airport Museum to see if they can photograph their F27 cockpit area to give the detail required.
So, the dashboard rebuild is now largely completed. The before and after photos show the difference and I think it’s looking much better already. Next step will be a clean around the main dash area and centre console before replacing the missing switches and other items in the overhead panels. Then it will be the painting and labelling. The aim is to have the basic rebuild completed by the time we open in February with painting and additional rebuild taking place over next winter.
Watch this space for updates.
The photos below are:
- F-27 Cockpit Refurb 01 – The dash at the beginning of Nov 2021 before work started.
- F-27 Cockpit Refurb 02 – The first instrument CAD drawing I created.
- F-27 Cockpit Refurb 03 – The first instrument imported into the 3D printing software. Notice on this picture there is a framework of supports that are there to allow the printing to happen without warping or drooping.
- F-27 Cockpit Refurb 04 – The dash as it looks on 21st Dec 2021, after the instruments, light panels, switches and knobs have been added.
- F-27 Cockpit Refurb 05 – A wide angle view of the full cockpit as it is on 21st Dec 2021.
- F-27 Cockpit Refurb 06 – An original and a replica lighting bar that has been fitted to the dash panel.
Paul
(Photos) F-27 Cockpit Refurb
![]()
As before, I am indebted to the contributors for their input to this and many other editions throughout the year.
bloginfo
The Repeat Info
I make no apologies for keeping his section in our blog, as we are a charitable organisation relying on the public to keep us going. Any help we receive is gratefully accepted and enables the museum to continue in our mission “To conserve, preserve and promote the history of aviation in East Anglia, whilst providing a fun, family-friendly and interactive museum, promoting education and remembrance of the events of the past“.
Are you thinking of helping ??
 We obtain most of our finances by donations and by membership fees. We save money by having a dedicated group of volunteers that keep the museum and the exhibits maintained. We hope therefore a few people may consider helping in the ways below.
There are three easy ways to help: Help by becoming a Museum Member, also by Volunteering to help at the museum, or by Donating to assist in our running costs. Please click on the appropriate button below to access the appropriate information:
Keep Up To Date
![]() To keep up to date with further information, please keep an eye on our Social Media (see the Social Media buttons at the foot of this blog) or click on the button below to be notified by email of any upcoming changes by seeing the latest blog.
To keep up to date with further information, please keep an eye on our Social Media (see the Social Media buttons at the foot of this blog) or click on the button below to be notified by email of any upcoming changes by seeing the latest blog.
For all other details on the museum, please go to our main web page by clicking on the picture below.


